Resistance Band Full-Body Workout: 30 Minutes, One Set of Bands
This article may contain affiliate links. If you make a purchase through these links, we may earn a small commission at no extra cost to you. This helps us keep creating free content.
One set of resistance bands covers every major muscle group in your body for under $40. That is the whole premise of this workout: no rack, no bench, no 200 pounds of iron cluttering a spare room. A loop band, a long tube band with handles, and a doorway anchor are enough to train your chest, back, legs, shoulders, and arms in about 30 minutes. Bands also keep tension on the muscle through the entire range of motion, which is something a dumbbell only does at certain angles.
This is a full circuit you can run three times a week. Each exercise below names the movement, tells you how to set it up, and gives you sets and reps. Two strength tables follow so you can see the whole session at a glance and scale it for a beginner or for someone who already lifts.
What you need before you start
You need three things. A long tube band with handles (often sold as a single band or a stackable set rated 10 to 150 pounds, roughly $25 to $45), a flat loop band or two for the lower body (about $10 to $20), and a door anchor, which is a small foam-covered strap that wedges into a closed door. Most band sets ship with the anchor included. If yours did not, a standalone anchor runs about $8.
Pick a band tension that lets you finish the listed reps with the last two or three feeling hard. If you can rep out 20 with ease, the band is too light for that muscle. Most people end up using a heavier band for legs and back and a lighter one for shoulders and arms, which is exactly why stackable sets are worth the few extra dollars.
The warm-up (5 minutes, do not skip)
Fit Simplify Resistance Bands Set
Five resistance levels in a kit that fits in a drawer, gentle on the joints.
* Affiliate link. We may earn a commission at no extra cost to you.
Cold muscles and elastic tension do not mix well, so spend five minutes raising your body temperature and waking up the joints you are about to load. Stand on a loop band with feet hip-width and do 15 slow band pull-aparts at chest height to open the shoulders. Follow with 15 bodyweight squats, then 10 arm circles each direction. Finish with 10 slow hip hinges holding a light band to feel your hamstrings switch on.
The point of the warm-up is not to tire you out. It is to get blood into the muscles and to rehearse the movement patterns at low load. If a particular joint feels stiff, give it a few extra reps before you add band tension. This matters more as you get older, when connective tissue takes a little longer to warm through.
The full-body circuit, exercise by exercise
Run these eight exercises in order. Rest 45 to 60 seconds between sets. Beginners do two rounds of the circuit; once that feels manageable, build to three rounds. The whole thing takes 25 to 35 minutes depending on how long you rest.

1. Banded squat. Stand on a loop band with both feet, hold the top of the band at shoulder height. Sit back into a squat until your thighs are near parallel, then drive up. The band fights you on the way up, loading the top of the movement where squats are usually easy.
2. Standing chest press. Anchor a tube band in the door at chest height behind you. Face away, a handle in each hand, and press forward until your arms are straight. Step further from the door to add tension. This is your push for the chest and triceps.
3. Bent-over row. Stand on the middle of a tube band, hinge forward at the hips with a flat back, and pull both handles toward your ribs. Squeeze the shoulder blades together at the top. This trains the whole back and the rear shoulders.
4. Romanian deadlift. Stand on the band, hold the handles at thigh height, and hinge at the hips with a soft knee until you feel a stretch in the hamstrings. Stand tall to finish. Keep the back flat throughout.
5. Overhead press. Stand on the band, start with handles at shoulder height, and press straight overhead. Lower under control. This builds the shoulders and upper back.
6. Banded glute bridge. Lie on your back, loop band just above the knees, feet flat. Drive your hips up while pushing the knees out against the band. Hold the top for a second. This is one of the best joint-friendly moves for the glutes.
7. Biceps curl. Stand on the band, palms up, and curl the handles toward your shoulders without swinging. The band makes the top of the curl the hardest part, which most weights cannot do.
8. Banded pull-apart hold. Hold a loop band at chest height, arms straight, and pull it apart until your arms are wide. Hold the stretched position for two seconds each rep. This finishes the upper back and shoulders and improves posture.
Sets and reps: the full session
Here is the complete workout laid out. Follow the beginner column for your first month, then move to the standard column as your strength improves. Reps stay in a range that builds both strength and muscle without needing heavy loads.
| Exercise | Beginner | Standard | Muscle worked |
|---|---|---|---|
| Banded squat | 2 × 12 | 3 × 15 | Quads, glutes |
| Standing chest press | 2 × 10 | 3 × 12 | Chest, triceps |
| Bent-over row | 2 × 12 | 3 × 15 | Back, rear delts |
| Romanian deadlift | 2 × 10 | 3 × 12 | Hamstrings, glutes |
| Overhead press | 2 × 10 | 3 × 12 | Shoulders |
| Glute bridge | 2 × 15 | 3 × 20 | Glutes |
| Biceps curl | 2 × 12 | 3 × 15 | Biceps |
| Pull-apart hold | 2 × 12 | 3 × 15 | Upper back |
Rest 45 to 60 seconds between sets and 90 seconds between full rounds. If you only have 20 minutes, cut the rest to 30 seconds and run two rounds. The session still hits every muscle group.
How to make it harder over time
Progress with bands works differently than with weights, but it still works. You have four levers to pull as you get stronger, and you should change only one at a time so you can tell what is driving the gains.
| Method | How to apply it | Best for |
|---|---|---|
| Heavier band | Swap to the next tension up or stack two bands | Big lifts: squat, row, press |
| More tension | Step further from the anchor or shorten your grip | Fine-tuning any exercise |
| More reps | Add 2-3 reps per set before adding bands | Smaller muscles: arms, shoulders |
| Slower tempo | Take 3 seconds to lower each rep | Joint-friendly intensity |
The slower-tempo lever is the one most people ignore, and it is the most joint-friendly way to add difficulty. A three-second lowering phase on every rep roughly doubles the time your muscle spends under tension without adding a single pound. That is real work your knees and shoulders will barely notice.
How often and what to expect
Three full-body sessions a week, with a rest day between each, is the sweet spot for this circuit. Your muscles adapt during recovery, not during the workout, so training the same muscles two days in a row gives you less progress, not more. Two sessions a week still produces steady gains if three does not fit your life.
Strength shows up first, usually within two to three weeks, as the listed reps start to feel easy and you reach for a heavier band. Visible muscle change takes longer, typically six to twelve weeks of consistent training paired with enough protein. Bands will not turn you into a powerlifter, but for building and keeping functional strength at home, this circuit covers the whole job.
Common form mistakes that rob you of results
The most frequent mistake is letting the band snap back on the return phase. When you fire a rep up and then let the elastic pull your arms back fast, you skip half the work. The lowering phase, called the eccentric, is where a large share of muscle growth happens. Control every return over two to three seconds and the same band suddenly feels far harder.
The second mistake is standing too close to the anchor or on too little band, so the tension runs out before your muscle does. If a press or row feels easy the whole way and only bites at the very end, step back or shorten your grip until the resistance challenges the working part of the range. You want the hardest point of the band to line up with the strongest part of your push or pull.
The third mistake is swinging and using momentum, especially on curls and rows. A band rewards strict form because cheating with body sway lets the elastic do the work for you. Plant your feet, brace your midsection, and move only the joint the exercise targets. Slower and stricter beats faster and sloppier every time with bands.
Anchoring and equipment care
Where you anchor the band changes which exercises you can do and how safe they are. A door anchor at the top of a closed door lets you do lat pulldowns and face pulls. At chest height it gives you presses and rows. Near the floor it sets up curls, rows, and pull-throughs. Learning to move one anchor between three heights effectively triples the exercises a single band set can deliver.
If you do not have a door anchor, you can stand on the band for most lower-anchor moves, or loop it around a heavy, stable post. Never anchor a band to anything that could move, tip, or break, and never to a person. The band stores a lot of energy when stretched, and a failed anchor sends a handle flying at speed.
Care extends a band set's life from months to years. Wipe sweat off after sessions, store the bands coiled loosely rather than knotted, and keep them out of direct sun and away from radiators. Heat and ultraviolet light are what crack rubber over time, not the stretching itself. Check the full length and both handle attachments for nicks before every workout, and retire any band the moment you see a crack starting.
Frequently asked questions
Can resistance bands really build muscle? Yes. Muscle responds to tension and effort, not to the specific tool providing it. As long as the last few reps of a set are hard and you progress over time, bands build muscle the same way weights do.
Are bands enough on their own, or do I need weights too? For most people training at home for general strength and health, a good band set is enough on its own. If your goal is maximum size or competitive lifting numbers, you will eventually want heavier loads than bands provide for the biggest movements.
How do I know which band tension to buy? Buy a stackable set rather than a single band. The set lets you match tension to each exercise and to your progress, which a single fixed band cannot do. Starter sets covering roughly 10 to 150 pounds are the most versatile.
Will bands be easier on my joints than weights? Many people with knee, shoulder, or back issues find bands easier on the joints because the resistance is lightest at the most vulnerable, stretched position and builds as the muscle reaches its strongest range. That said, talk to a doctor or physio about any specific joint condition.
How long do resistance bands last? A quality band used a few times a week typically lasts one to three years. Store them out of direct sunlight and away from heat, since UV and heat degrade the rubber. Inspect for cracks before each session and replace any band showing wear.
Can I do this workout if I have knee or back issues? The circuit is gentler on the joints than free weights because tension is lowest at the most vulnerable positions. Even so, drop the load, slow the tempo, and skip any movement that hurts. Anyone with a diagnosed knee, back, or shoulder problem should clear a new programme with a doctor or physiotherapist first and ask about safe substitutions.
How should I split the workout if I cannot do all eight exercises in one go? Split it across two shorter sessions. Do the push and lower-body moves on one day and the pull and arm moves on another, two or three days apart. Two 15-minute sessions cover the same ground as one 30-minute session and can be easier to fit into a busy week.
Do I need a rest day, or can I train every day? Take at least one rest day between full-body sessions. Muscles rebuild stronger during recovery, not during the workout itself, so training the same muscles daily slows progress and raises the risk of nagging strains. On rest days, a walk or light mobility work is ideal.
🛠️ Free tools for this topic
No sign-up. They do the calculating and checking for you.
Published by the Gym4Home editorial team. Published June 4, 2026. Updated June 5, 2026.
Editorial responsibility: see Imprint.
Spotted an error or have something to add? corrections@gym4home.com
Home Gym Tips, Weekly
Equipment picks, workout ideas, and setup guides — for every space and every budget. No fluff, just useful.
🎁 Free bonus: The Home Gym Starter Checklist (PDF)
You might also like

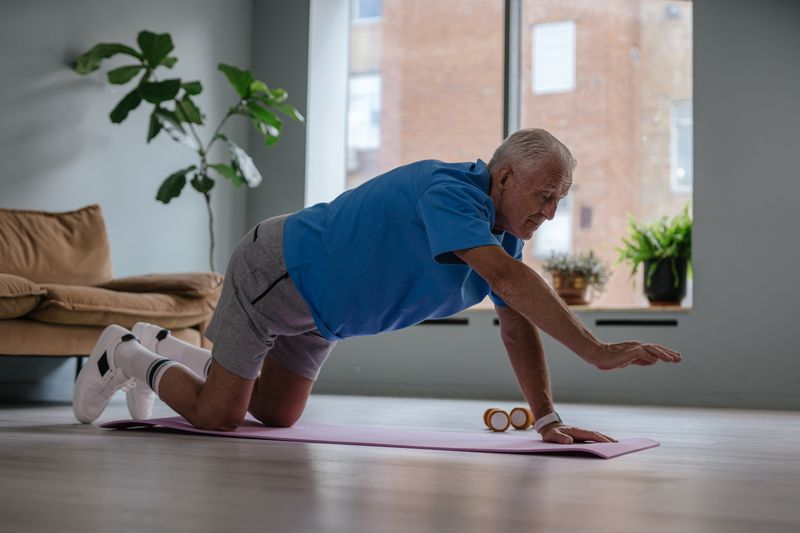
3-Day Full-Body Home Gym Workout (With Sets and Reps)
A complete 3-day full-body home gym workout with sets, reps and form cues for every lift, built around dumbbells, a bench and a doorway pull-up bar.
A 30-Minute Dumbbell Workout for Seniors (Full-Body, Joint-Friendly)
A complete 30-minute full-body dumbbell workout for older adults, with a sets-and-reps table, step-by-step form for seven exercises, and safe progression tips.
Best Resistance Bands for a Home Gym in 2026
The three resistance band types compared, with US prices, sizing without printed pounds, durability traps, and a complete band workout.
📖 All articles on Gym4Home →
Browse our other articles